Maintaining a driveway is crucial for any homeowner looking to enhance their home’s curb appeal and longevity. Sealing your driveway is a vital part of this maintenance, offering protection from the elements, preventing cracks, and keeping it looking fresh and new. This comprehensive guide provides a step-by-step approach to sealing your driveway, ensuring a successful project from start to finish.
Understanding Driveway Sealing
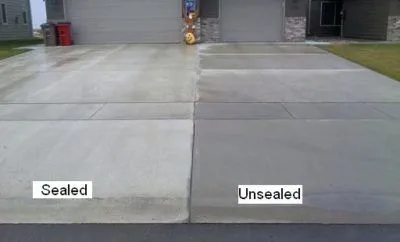
Before diving into the process, it’s important to understand what driveway sealing is and why it’s beneficial. Driveway sealant is a protective coating applied to asphalt or concrete driveways. It acts as a barrier against weathering, UV rays, oil spills, and other damaging factors. Regular sealing extends the life of your driveway and enhances its appearance, potentially saving you money on costly repairs in the long run.
Step 1: Choosing the Right Sealant
Selecting the appropriate sealant for your driveway is the first critical step. There are several types of sealants available:
- Acrylic Sealers: Provide a protective layer and are available in different finishes. They’re durable and great for enhancing color.
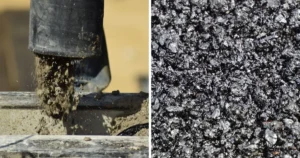
- Asphalt Emulsion Sealers: Eco-friendly and easier to apply. Ideal for blacktop driveways.
- Coal Tar Sealers: Offer the best protection against water and chemicals but are less environmentally friendly.
Consider your local climate, the current condition of your driveway, and environmental regulations when choosing a sealant.
Step 2: Preparing the Driveway
Proper preparation is essential for a successful sealing:
- Cleaning: Start by thoroughly cleaning your driveway. Remove dirt, debris, and stains using a broom, hose, or pressure washer. For tough stains, use a degreaser or detergent.
- Repairing Cracks: Before applying sealant, repair any cracks or holes in the driveway using a patching compound designed for asphalt or concrete. Allow it to cure as directed.
- Trimming Edges: Trim grass and vegetation along the driveway edges to ensure the sealant adheres properly.
Step 3: Checking the Weather
Weather plays a significant role in the sealing process. Choose a day with clear, dry weather, and moderate temperatures (generally between 50°F and 90°F). Avoid sealing if rain is forecasted within 24 hours of application.
Step 4: Applying the Sealant

Now it’s time to apply the sealant. You’ll need tools like a long-handled roller, brush, or squeegee, and proper protective gear.
- Mixing: Stir the sealant thoroughly to ensure a consistent mixture.
- Edges: Start by applying sealant to the edges of the driveway with a brush. This precision work ensures complete coverage.
- Main Surface: Use a roller or squeegee to apply sealant to the main area. Work in small sections, maintaining a wet edge to prevent seams. Apply a thin, even coat to avoid puddling.
Step 5: Curing
After application, the sealant needs time to dry and cure. Avoid using the driveway for at least 24-48 hours. Curing times may vary based on the product and weather conditions, so refer to the manufacturer’s instructions.
Step 6: Applying a Second Coat (If Necessary)
Some driveways, especially those with rough surfaces or in areas with heavy weathering, may benefit from a second coat. If recommended by the sealant manufacturer, apply the second coat perpendicular to the first to ensure even coverage.
Maintenance After Sealing
- Regular Cleaning: Keep the driveway clean from debris, oil, and chemicals.
- Reapply Sealant: Depending on the product and conditions, reseal your driveway every 2-4 years.
- Monitor for Damages: Regularly check for cracks or wear and address them promptly.
Tips for Success
- Avoid Sealing New Asphalt: Wait at least six months before sealing a new asphalt driveway to allow it to fully cure.
- Test a Small Area: Before starting, test the sealant on a small, inconspicuous area to ensure it adheres well and provides the desired finish.
- Don’t Cut Corners: Use quality products and take your time with each step for the best results.
Safety Considerations
- Protective Gear: Wear gloves, goggles, and clothing that covers your skin to protect against splashes.
- Ventilation: Work in a well-ventilated area to avoid inhaling fumes.
Conclusion
Sealing your driveway is a rewarding project that not only enhances your home’s curb appeal but also protects your investment for years to come. By following this step-by-step guide, you’ll ensure a successful seal that stands the test of time. Remember, the key to a long-lasting driveway is not just in the sealing process but in ongoing maintenance and care. So, are you ready to seal the deal? Your driveway awaits its rejuvenating coat, promising a summer of beauty and a future of durability.